UNIVERSITY OF WISCONSIN River Falls
Documentation
Add a Document
IMPORTANT: Upload a New Document Version replaces an existing version. The following is for a first-time upload.
Adding and Linking a Document
There are two steps to adding and linking a document.
- First, upload the document to the server.
- link the document inside your formatted text block.
Step One
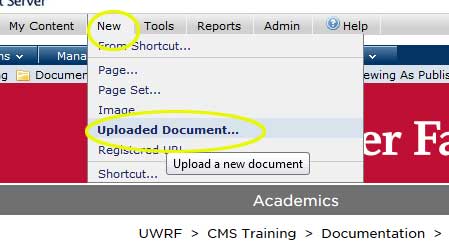
- In the gray navigation click new, then uploaded document.
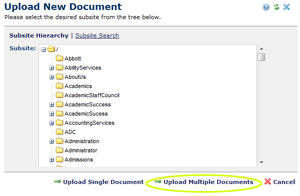
2. You will then select the subsite you want to place your document in. (The subsite you are in is the default)
3. Then Select "Upload Multiple Documents"
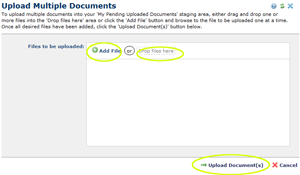
4. Drag and drop the document or "add file" to browse to select the document.
5. Click upload documents. Then click next.
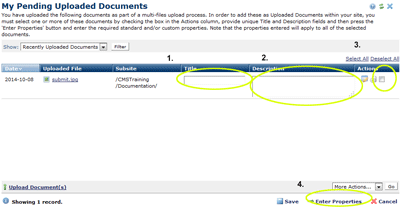
6. In the window called "My Pending Uploaded Documents" give your document a Title and a Description. Under Actions click the check box or "Select All".
7. Click "Enter Properties" and then "Save".
8. Exit out of both windows. You have uploaded the document to the server.
Step Two
To add a new document, create a link in a text block and choose the Uploaded Document File type.
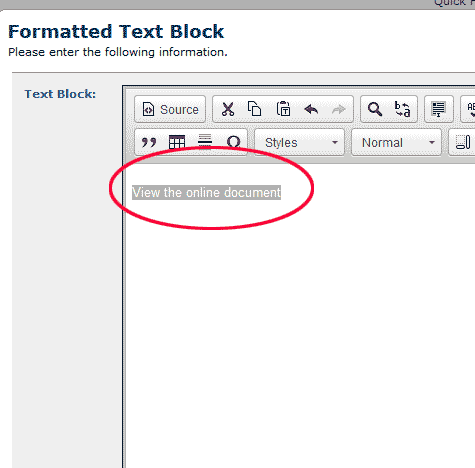
- Highlight the text that you want to link to the document.
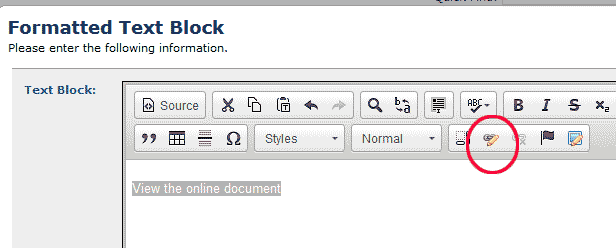
- Click the Link icon.
- Choose the link type "Uploaded Document".
4. Locate and select your document and then save. (Choose sort by date to find the document faster)
Related: Upload a New Document Version.


