This is the information that will appear when the user clicks the blind. It can be any format and include images but should not contain another blind.
Text in a blind in a blind.
UNIVERSITY OF WISCONSIN River Falls
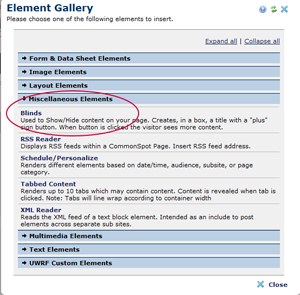
1. Click to insert new element and choose Blinds from Miscellaneous in the Template Gallery.
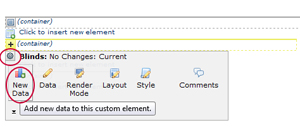
2. Click the round gear to show this screen:
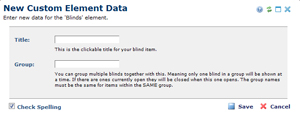
3. Enter the Title. This is what will appear as a link with a plus sign next to it. Clicking the red link will open the blind to display more information.
4. Enter a Group (optional) - if you want blinds to close automatically when a different blind is clicked. Use the same Group name for each blind.
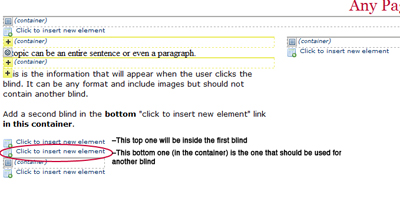
Note that inside the container, the top gear is for the blind. Inside the blind is a new container where you can add a text element. Make sure you click the top "insert" to insert information for your first blind. (The bottom "insert" would be what you click for the next blind.)

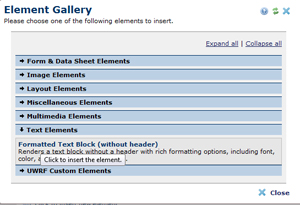
5. Choose the Formatted Text Block from the Element Gallery and define it to enter your hidden information.
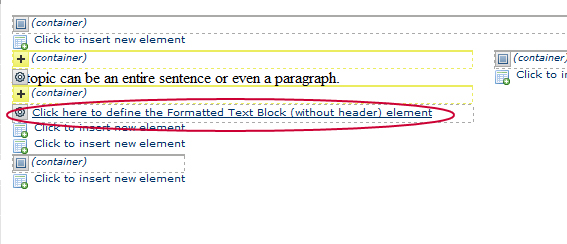
6. Add additional blinds by clicking the bottom element to add the next blind.
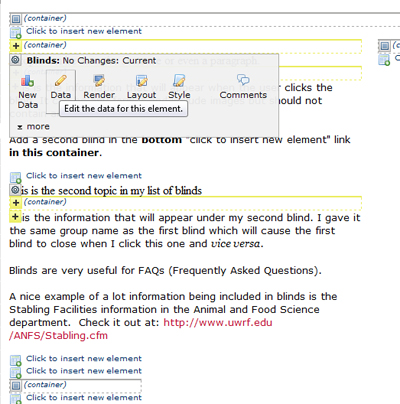
You can change the information in the blind by editing the data for the element.
This is the information that will appear when the user clicks the blind. It can be any format and include images but should not contain another blind.
Text in a blind in a blind.
Blinds are very useful for FAQs (Frequently Asked Questions).
A nice example of a lot information being included in blinds is the Stabling Facilities information in the Animal and Food Science department. Check it out at: https://www.uwrf.edu/ANFS/Stabling.cfm
Text in a blind in a blind.
Blinds should appear opened when you are in author mode and will not show up as blinds until you Submit.
If a blind is closed in authoring mode, you can open it by clicking it. You can also use "Actions" in the dark blue menu bar and click "Clear & Update Page Cache" (at the bottom of that list) to open all the blinds.
Blinds cannot be copied and pasted in their entirety - but they can be moved. Click the round gear for the blind, click More, choose Move Up, Move Down, Move to Top, or Move to Bottom.